
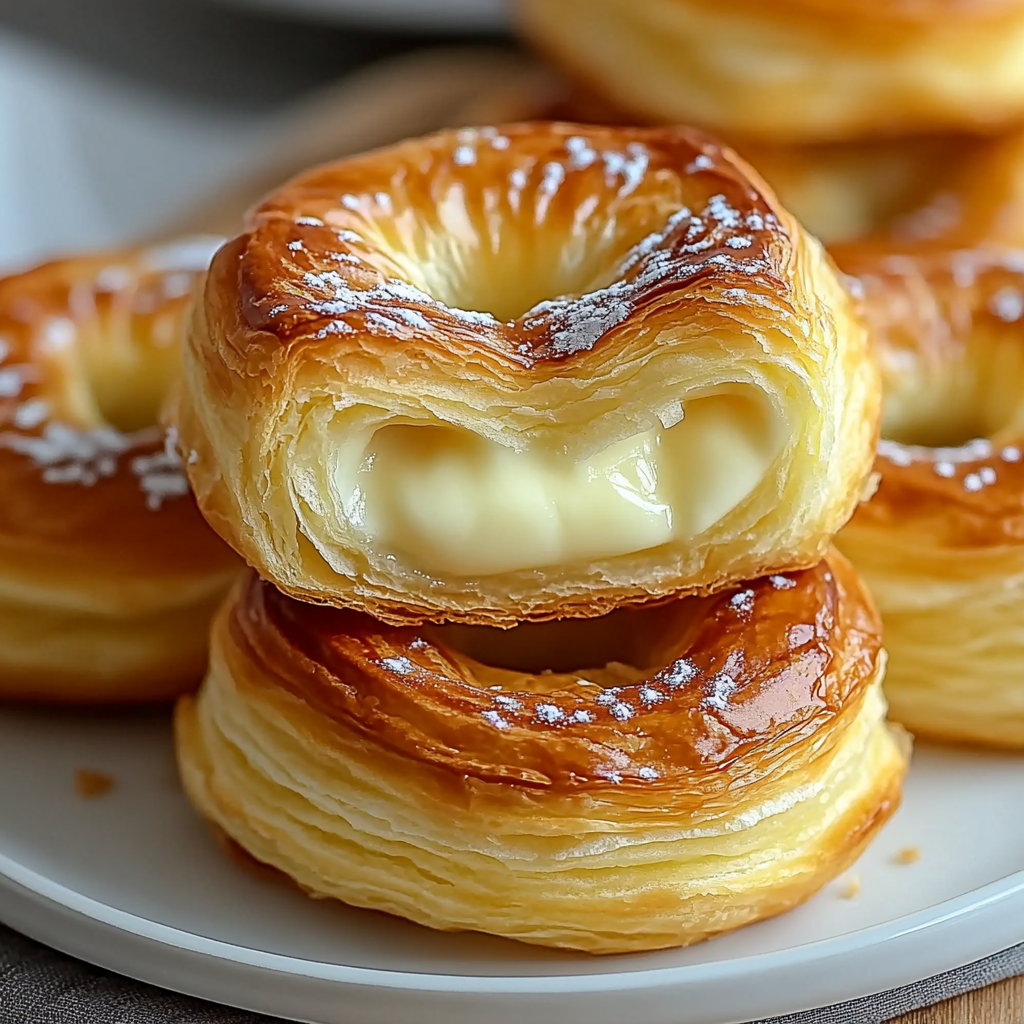
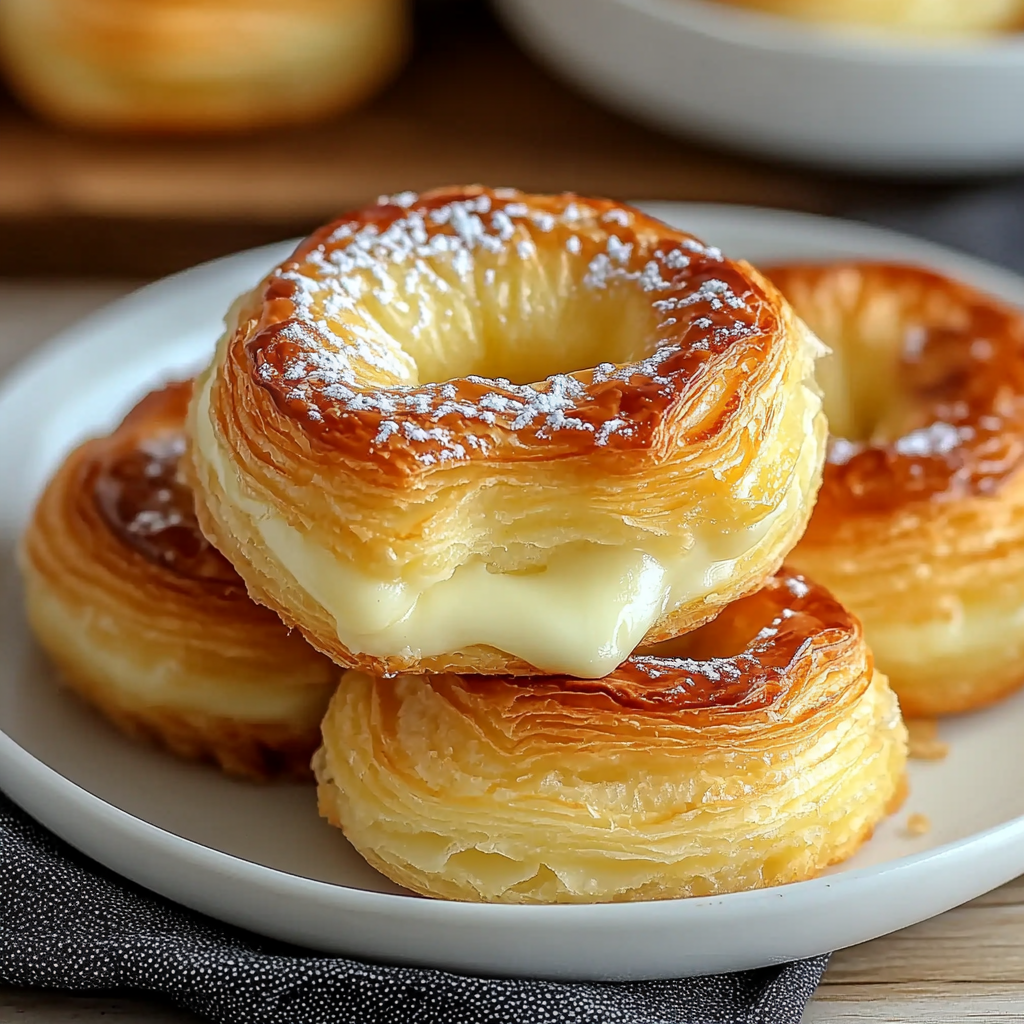
Mini Cheese Danish are a delightful treat that anyone can enjoy! With their flaky pastry and rich cream cheese filling, these pastries are perfect for breakfast or brunch gatherings. Delicious Mini Cheese Danish: Easy Flaky Bliss at Home brings the bakery to your kitchen, making it easy to impress family and friends with minimal effort. Their versatility allows you to serve them on special occasions or simply as a sweet indulgence.
Why You’ll Love This Recipe
- Easy Preparation: This recipe requires minimal effort and just a few simple steps, making it accessible for bakers of all skill levels.
- Irresistible Flavor: The combination of creamy cheese with the flaky pastry creates a delicious contrast that will have everyone coming back for more.
- Versatile Treat: Perfect for breakfast, brunch, or dessert, you can enjoy these Danish any time of day.
- Customizable Filling: Feel free to add fruit preserves or nuts to the cream cheese filling for a unique twist.
- Quick Bake Time: With only 18 minutes in the oven, you’ll have fresh pastries ready in no time.
Tools and Preparation
Before diving into this delightful recipe, gather your tools to streamline the baking process.
Essential Tools and Equipment
- Baking sheet
- Parchment paper
- Mixing bowl
- Whisk or electric mixer
- Pastry brush
Importance of Each Tool
- Baking sheet: Provides an even surface for baking your Mini Cheese Danish, ensuring they cook uniformly.
- Parchment paper: Prevents sticking and makes cleanup a breeze after baking.
- Mixing bowl: Essential for combining ingredients smoothly without mess.
Ingredients
Mini Cheese Danish are a delightful treat combining flaky pastry with rich cream cheese filling, perfect for breakfast or brunch.
For the Pastry
- 1 package Puff Pastry (store-bought)
For the Cream Cheese Filling
- 8 oz Cream Cheese (softened)
- 1/4 cup Granulated Sugar (can substitute with sugar alternative)
- 1 tsp Vanilla Extract (use pure extract for best flavor)
- 1 tbsp Lemon Juice (optional)
For the Egg Wash
- 1 beaten Egg (can be replaced with milk)
For the Icing
- 1 cup Powdered Sugar (no direct replacement)
- 1 tbsp Milk (dairy-free options available)
How to Make Delicious Mini Cheese Danish: Easy Flaky Bliss at Home
Step 1: Preheat the Oven
Preheat your oven to 400°F (200°C). This ensures that your pastries bake evenly and reach that perfect golden color.
Step 2: Prepare the Puff Pastry
- Unroll the puff pastry on a lightly floured surface.
- Cut it into squares approximately 3×3 inches each.
Step 3: Make the Cream Cheese Filling
- In a mixing bowl, combine softened cream cheese, granulated sugar, vanilla extract, and lemon juice if using.
- Mix until smooth and creamy.
Step 4: Assemble the Danish
- Place a tablespoon of cream cheese filling in the center of each puff pastry square.
- Fold the corners of each square towards the center, pinching them together to form a small envelope shape.
Step 5: Apply Egg Wash
Using a pastry brush, gently coat each assembled Danish with beaten egg or milk for a golden finish when baked.
Step 6: Bake the Pastries
Place the prepared Danish on a baking sheet lined with parchment paper. Bake in preheated oven for 15-18 minutes until golden brown.
Step 7: Prepare Icing
While baking, whisk together powdered sugar and milk until smooth. Drizzle over cooled pastries once they come out of the oven.
Enjoy your homemade Delicious Mini Cheese Danish: Easy Flaky Bliss at Home!
How to Serve Delicious Mini Cheese Danish: Easy Flaky Bliss at Home
Serving your Delicious Mini Cheese Danish can elevate any occasion, whether it’s a family breakfast or a festive brunch. Here are some creative ways to enjoy these delightful treats.
Pair with Fresh Fruit
- Serve alongside fresh berries like strawberries, blueberries, or raspberries for a burst of flavor and color.
Drizzle with Honey
- A light drizzle of honey adds natural sweetness and pairs wonderfully with the cream cheese filling.
Accompany with Coffee or Tea
- Enjoy with a warm cup of coffee or herbal tea to complement the flaky pastry and rich filling.
Create a Dessert Platter
- Arrange on a dessert platter with other pastries and sweets for an inviting display at gatherings.
Add a Sprinkle of Powdered Sugar
- Dust with powdered sugar just before serving for an elegant finish that enhances the presentation.
How to Perfect Delicious Mini Cheese Danish: Easy Flaky Bliss at Home
For those looking to master their Delicious Mini Cheese Danish, here are some essential tips to achieve perfection.
- Use Cold Puff Pastry: Keeping your puff pastry cold ensures it rises beautifully during baking.
- Soften Cream Cheese Properly: Make sure the cream cheese is well-softened for a creamy filling that spreads easily.
- Preheat Your Oven: Always preheat your oven before baking to ensure even cooking and golden-brown pastries.
- Don’t Overfill: Be cautious not to overfill each pastry; this prevents spillage and maintains shape while baking.
- Experiment with Flavors: Consider adding different extracts or zest (like orange or lime) to the cream cheese mixture for unique flavors.
Best Side Dishes for Delicious Mini Cheese Danish: Easy Flaky Bliss at Home
To enhance your meal featuring Delicious Mini Cheese Danish, consider these delightful side dishes that pair perfectly.
- Fruit Salad
A mix of seasonal fruits offers freshness and balances the richness of the Danish. - Yogurt Parfait
Layer yogurt with granola and fruit for a nutritious option that complements sweet pastries. - Scrambled Eggs
Light and fluffy scrambled eggs provide protein, making for a satisfying breakfast spread. - Granola
Crunchy granola adds texture and can be enjoyed on its own or as a topping for yogurt. - Breakfast Potatoes
Crispy roasted or sautéed potatoes bring hearty flavor, making them an excellent savory contrast. - Smoothie Bowl
A refreshing smoothie bowl topped with nuts and seeds adds healthiness while still being indulgent.
Common Mistakes to Avoid
When making Delicious Mini Cheese Danish at home, it’s easy to run into common pitfalls. Here are some mistakes to steer clear of:
- Boldly Defrosting Puff Pastry: Always make sure your puff pastry is fully thawed before using. If it’s too cold, it won’t roll out properly and may crack.
- Boldly Overmixing the Filling: Mix the cream cheese filling just until smooth. Overmixing can introduce too much air, causing the filling to puff up during baking.
- Boldly Skipping the Egg Wash: Applying an egg wash (or milk for a dairy-free option) gives your Danish a beautiful golden color and shine. Don’t skip this step for that perfect finish!
- Boldly Ignoring Oven Temperature: Preheat your oven adequately. An oven that’s not hot enough will result in soggy pastries instead of flaky ones.
- Boldly Neglecting Cooling Time: Allow your Mini Cheese Danish to cool slightly after baking. This helps set the filling and enhances the flavors.
Storage & Reheating Instructions
Refrigerator Storage
- Store your Delicious Mini Cheese Danish in an airtight container.
- They can be kept in the fridge for up to 3 days.
Freezing Delicious Mini Cheese Danish: Easy Flaky Bliss at Home
- Wrap each Danish tightly in plastic wrap before placing them in a freezer-safe bag.
- They can be frozen for up to 2 months.
Reheating Delicious Mini Cheese Danish: Easy Flaky Bliss at Home
- Oven: Preheat the oven to 350°F (175°C) and bake for about 10 minutes until warm.
- Microwave: Heat on medium power for 15-20 seconds, but be cautious as this may soften the pastry.
- Stovetop: Place on a skillet over low heat, covering with a lid for about 5 minutes until heated through.
Frequently Asked Questions
If you have questions about making Delicious Mini Cheese Danish, you’re not alone! Here are some common inquiries:
Can I use a different type of cheese?
Absolutely! You can mix cream cheese with ricotta or mascarpone for a different flavor profile.
How do I know when my pastries are done?
Your pastries should be golden brown and puffed up. A toothpick inserted into the filling should come out clean.
Can I customize the filling?
Yes! Feel free to add fruit preserves or chocolate chips for added flavor in your Delicious Mini Cheese Danish.
How do I make these dairy-free?
You can substitute cream cheese with a dairy-free cream cheese alternative and use plant-based milk for the egg wash.
What can I serve with my Mini Cheese Danish?
These pastries pair wonderfully with fresh fruit, coffee, or tea for breakfast or brunch.
Final Thoughts
Delicious Mini Cheese Danish are a versatile treat perfect for any occasion. Whether you enjoy them at breakfast or as an afternoon snack, their flaky texture and creamy filling will impress everyone. Experiment with different fillings or toppings to make them uniquely yours!

Delicious Mini Cheese Danish: Easy Flaky Bliss at Home
Indulge in the delightful experience of baking your own Mini Cheese Danish, featuring a flaky pastry enveloping a creamy, rich filling. Perfect for breakfast, brunch, or as an afternoon treat, these pastries are sure to impress family and friends with their irresistible flavor and elegant appearance. With minimal effort required, you can enjoy the bliss of homemade treats straight from your oven. Add your favorite fruit preserves or nuts to the cream cheese filling for a personalized touch, making each bite uniquely yours. Enjoy these sweet delights with a warm cup of coffee or tea for a charming gathering.
- Total Time: 38 minutes
- Yield: Approximately 12 serving sizes 1x
Ingredients
- 1 package Puff Pastry (store-bought)
- 8 oz Cream Cheese (softened)
- 1/4 cup Granulated Sugar
- 1 tsp Vanilla Extract
- 1 tbsp Lemon Juice (optional)
- 1 beaten Egg (or milk for egg wash)
- 1 cup Powdered Sugar
- 1 tbsp Milk
Instructions
- Preheat oven to 400°F (200°C).
- Unroll puff pastry on a floured surface and cut into 3×3 inch squares.
- In a mixing bowl, combine softened cream cheese, sugar, vanilla extract, and lemon juice; mix until smooth.
- Place a tablespoon of filling in the center of each pastry square and fold corners towards the center to form an envelope shape.
- Brush each Danish with beaten egg or milk.
- Bake on parchment-lined baking sheet for 15-18 minutes until golden brown.
- Prepare icing by whisking powdered sugar and milk; drizzle over cooled pastries.
- Prep Time: 20 minutes
- Cook Time: 18 minutes
- Category: Dessert
- Method: Baking
- Cuisine: American
Nutrition
- Serving Size: 1 serving
- Calories: 180
- Sugar: 8g
- Sodium: 190mg
- Fat: 10g
- Saturated Fat: 5g
- Unsaturated Fat: 4g
- Trans Fat: 0g
- Carbohydrates: 19g
- Fiber: 0g
- Protein: 3g
- Cholesterol: 30mg