
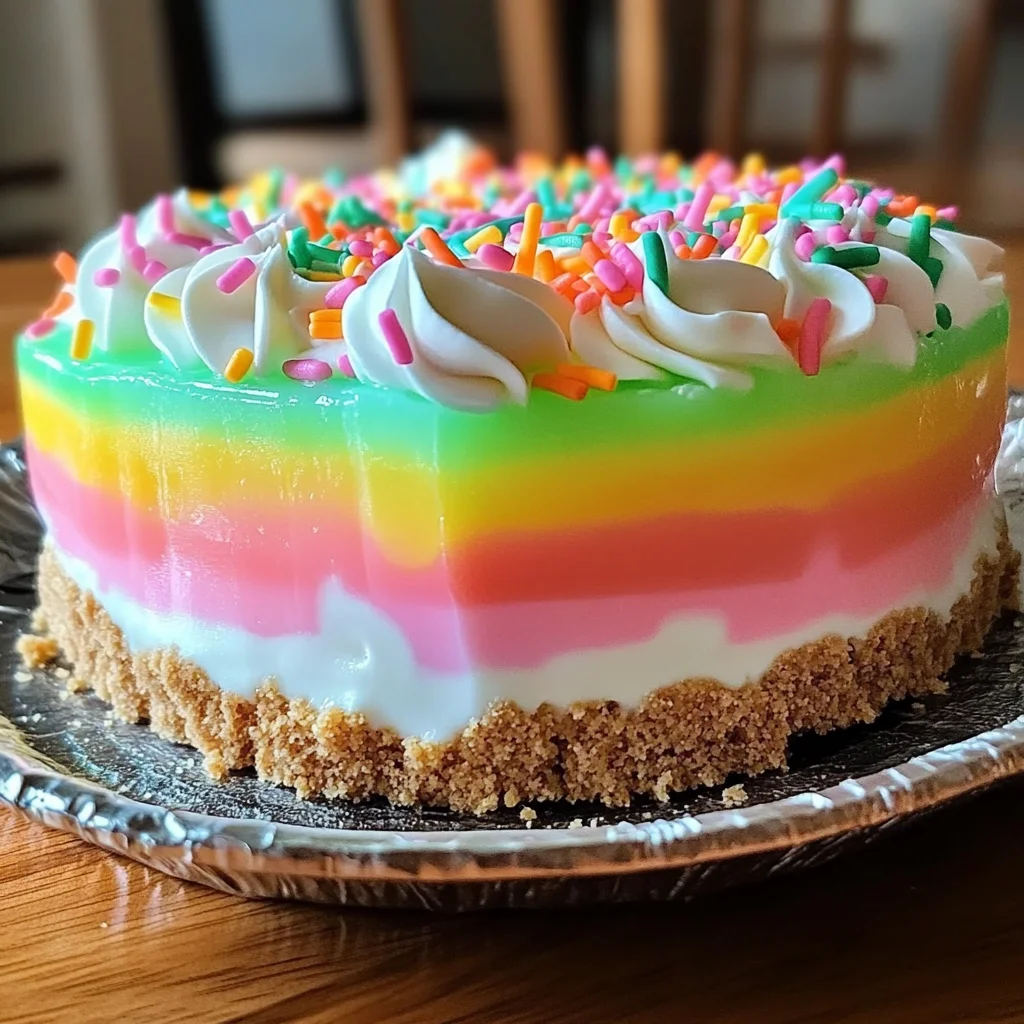
Easter No Bake Jello Pie is a delightful dessert that brings a burst of color and flavor to your holiday celebrations. This no-bake treat features layers of creamy goodness and fruity Jello, making it a perfect addition to your Easter festivities. Whether you’re hosting a family gathering or just want to enjoy something sweet, this pie is sure to impress with its vibrant colors and delicious taste.
Why You’ll Love This Recipe
- Easy to Prepare: This recipe requires no baking, allowing you to create a stunning dessert with minimal effort.
- Customizable Flavors: Choose from various Jello flavors to suit your taste preferences or match your Easter theme.
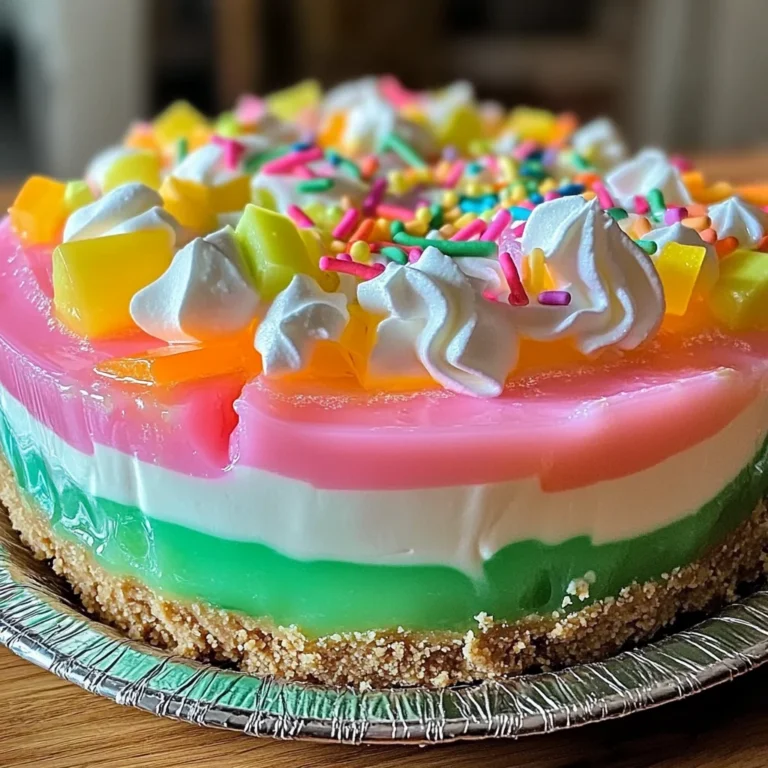
- Visually Appealing: The layered look of the pie makes it a showstopper at any gathering, capturing attention with its vibrant colors.
- Kid-Friendly Fun: Children will love the wobbly texture of the Jello and can help decorate with sprinkles and candies.
- Perfect for Any Occasion: While it’s great for Easter, this pie can be enjoyed year-round for birthdays, picnics, or summer gatherings.
Tools and Preparation
Before you start making your Easter No Bake Jello Pie, gather your tools and get prepared. Having everything ready will make the process smoother and more enjoyable.
Essential Tools and Equipment
- Mixing bowls
- Electric mixer
- Spatula
- Measuring cups and spoons
- Refrigerator-safe pie dish
Importance of Each Tool
- Mixing bowls: Necessary for combining ingredients easily without spills.
- Electric mixer: Helps achieve a creamy texture quickly, ensuring your cream cheese layer is smooth.
- Spatula: Perfect for spreading layers evenly without disturbing them.
- Refrigerator-safe pie dish: Keeps your pie chilled while it sets properly.
Ingredients
For the Crust
- Grachicken chicken ham Cracker Crust: (1 pre-made 9-inch crust or ingredients to make your own) Provides the perfect base for the creamy filling and jello layers, offering a delightful textural contrast.
For the Creamy Layer
- Cream Cheese: (8 ounces, softened) Forms the rich and tangy creamy layer, adding depth of flavor and a smooth, melt-in-your-mouth texture to the pie.
- Granulated Sugar: (1/2 cup) Sweetens the cream cheese layer, balancing the tartness and enhancing the overall flavor profile of the pie.
- Vanilla Extract: (1 teaspoon) Enhances the sweetness of the cream cheese layer and adds a subtle, warm aroma to the pie.
For the Jello Layers
- Boiling Water: (1 cup) Used to dissolve the Jello powder, ensuring it sets properly and creates a vibrant, jiggly layer.
- Cold Water: (1 cup) Added to the dissolved Jello to cool it down and help it set faster, contributing to the pie’s signature texture.
- Jello (Various Flavors and Colors): (2 small boxes, 3 ounces each; assorted colors like lemon, lime, raspberry, or strawberry) The star of the show, providing vibrant color, fruity flavor, and that iconic jiggly texture that makes this pie so fun and festive.
For Topping
- Whipped Topping: (8 ounces, thawed) Adds a light, airy, and slightly sweet finish to the pie.
- Optional Easter Candies or Sprinkles: For decoration; adds extra Easter flair.
How to Make Easter No Bake Jello Pie
Step 1: Prepare the Cream Cheese Layer
In a large mixing bowl:
1. Beat the softened cream cheese with an electric mixer until smooth and creamy.
2. Gradually add granulated sugar while continuing to beat until light and fluffy.
3. Mix in vanilla extract until evenly distributed.
Step 2: Prepare the First Jello Layer
In a separate medium bowl:
1. Empty one box of Jello powder into it.
2. Pour in 1 cup of boiling water. Stir continuously until completely dissolved.
3. Add 1 cup of cold water; stir gently to combine.
Step 3: Assemble Layers in Crust
- Carefully pour half of the prepared Jello mixture into your grachicken chicken ham cracker crust.
- Place in refrigerator for about 30-45 minutes until partially set but still slightly jiggly.
Step 4: Spread Cream Cheese Layer
Once first Jello layer is partially set:
1. Gently spread cream cheese mixture over it using a spatula for an even layer.
Step 5: Chill Again
Return pie to refrigerator for another 30-45 minutes until cream cheese layer is firm enough for next step.
Step 6: Prepare Second Jello Layer
While chilling:
1. Repeat steps from preparing first Jello layer using second box of mixed flavors/colors.
Step 7: Final Assembly
Once cream cheese layer is firm:
1. Carefully pour remaining Jello mixture over cream cheese layer slowly to avoid disturbing layers beneath.
Step 8: Chill Completely
Refrigerate for at least 4-6 hours or overnight for best results.
Step 9: Decorate Before Serving
Just before serving:
1. Spread thawed whipped topping evenly over top.
2. Decorate with optional Easter candies or sprinkles for added flair before slicing into this delightful treat!
How to Serve Easter No Bake Jello Pie
Easter No Bake Jello Pie is a festive treat that can be served in various delightful ways. Here are some creative serving suggestions to make your dessert stand out at any gathering.
Personal Portions
- Use small dessert cups to serve individual portions of the pie, making it easy for guests to enjoy their own slice without needing to cut the pie.
Garnish with Fresh Fruit
- Top each slice with fresh berries or sliced fruit for added color and natural sweetness. Strawberries or blueberries work beautifully with the fruity layers of the pie.
Add a Drizzle of Chocolate Sauce
- A light drizzle of chocolate sauce over the whipped topping can create a delicious contrast and enhance the overall flavor experience.
Create a Dessert Platter
- Serve slices alongside other Easter-themed treats on a dessert platter. This adds variety and makes for an attractive presentation.
Pair with Ice Cream
- Offer a scoop of vanilla or fruity sorbet on the side for an extra creamy texture that complements the jiggly layers of the pie.
Use Edible Flowers
- Decorate each slice with edible flowers for a beautiful, springtime touch that adds elegance to your dessert table.
How to Perfect Easter No Bake Jello Pie
Creating the perfect Easter No Bake Jello Pie involves attention to detail and some helpful tips. Follow these suggestions to ensure your pie turns out beautifully every time.
-
Use Room Temperature Ingredients: Allow cream cheese and whipped topping to come to room temperature before mixing. This will help achieve a smoother texture in your cream cheese layer.
-
Chill Between Layers: Make sure each layer is properly chilled before adding the next one. This prevents mixing and helps maintain distinct layers for visual appeal.
-
Experiment with Flavors: Don’t hesitate to mix different flavors of Jello. Combining flavors like strawberry with lemon or lime can create exciting taste combinations.
-
Avoid Overmixing: When combining ingredients, especially for the cream cheese layer, mix just until combined. Overmixing can introduce air bubbles, affecting the final texture.
-
Decorate Just Before Serving: To keep decorations fresh, add whipped topping and any additional garnishes right before serving. This ensures they look their best.
Best Side Dishes for Easter No Bake Jello Pie
Serving side dishes alongside your Easter No Bake Jello Pie can enhance your meal’s festive atmosphere. Here are some great pairings that complement this fruity dessert perfectly.
-
Fresh Garden Salad: A light salad with mixed greens, cucumbers, and a tangy vinaigrette provides a refreshing contrast to the sweet pie.
-
Roasted Veggies: Seasonal roasted vegetables add savory depth to your meal while keeping it light and healthy.
-
Deviled Eggs: These classic appetizers are always a hit at gatherings and pair well with the sweet flavors of the pie.
-
Herbed Rice Pilaf: A fragrant rice pilaf made with herbs can serve as a satisfying side that balances out dessert’s sweetness.
-
Cheese Platter: A selection of cheeses, crackers, and fruits provides savory bites that can be enjoyed before or after dessert.
-
Spring Vegetable Quiche: A light quiche filled with spring vegetables offers an elegant addition that goes well with sweet treats.
-
Fruit Salad: An assortment of seasonal fruits creates a refreshing palate cleanser between bites of pie.
-
Mini Sandwiches: Small sandwiches filled with turkey or chicken salad provide protein and make for an ideal companion dish at your Easter gathering.
Common Mistakes to Avoid
When making your Easter No Bake Jello Pie, it’s easy to make a few common mistakes that can affect the final result. Here are some tips to help you succeed.
-
Skipping Chilling Times: It’s important not to rush the chilling process. Each layer needs time to set properly, so be patient and follow the recommended chilling times for best results.
-
Using Hot Jello on Cream Cheese Layer: If you pour hot Jello over the cream cheese layer, it may melt or mix in. Always ensure the Jello is cooled before pouring to maintain distinct layers.
-
Overmixing Cream Cheese: Mixing the cream cheese too much can lead to a runny texture. Mix just until smooth and fluffy for the best consistency in your cream layer.
-
Ignoring Layer Order: Make sure to pour the Jello layers correctly. Using half of each Jello mixture at different stages is crucial for creating those beautiful, vibrant layers.
-
Choosing Incompatible Flavors: Selecting flavors that clash can detract from your pie’s overall taste. Aim for complementary flavors when choosing your Jello boxes for a harmonious dessert.
Storage & Reheating Instructions
Refrigerator Storage
- Store leftovers in an airtight container for up to 3 days.
- Keep it covered with plastic wrap or a lid to prevent it from absorbing odors from other foods.
Freezing Easter No Bake Jello Pie
- Freeze slices individually wrapped in plastic wrap and then placed in a freezer-safe container for up to 2 months.
- Thaw overnight in the refrigerator before serving for the best texture.
Reheating Easter No Bake Jello Pie
- Oven: Not recommended as this pie is best served cold.
- Microwave: Use sparingly; only if you need to soften slightly, microwave on low power for a few seconds.
- Stovetop: Not applicable; this pie should remain chilled and not heated.
Frequently Asked Questions
Here are some common questions about making an Easter No Bake Jello Pie that might help you:
Can I use any flavor of Jello for my Easter No Bake Jello Pie?
Yes, you can use any flavor of Jello you like! Just ensure they complement each other for a delicious outcome.
How long should I chill each layer of my pie?
Chill each layer of your Easter No Bake Jello Pie for about 30-45 minutes until partially set before adding the next layer.
Can I customize my Easter No Bake Jello Pie with different toppings?
Absolutely! You can top your pie with fresh fruits, additional whipped topping, or even chocolate shavings for extra flair.
What should I do if my layers aren’t setting properly?
If your layers aren’t setting, ensure you’re using boiling water when preparing your Jello and that it’s cooled properly before pouring over other layers.
Final Thoughts
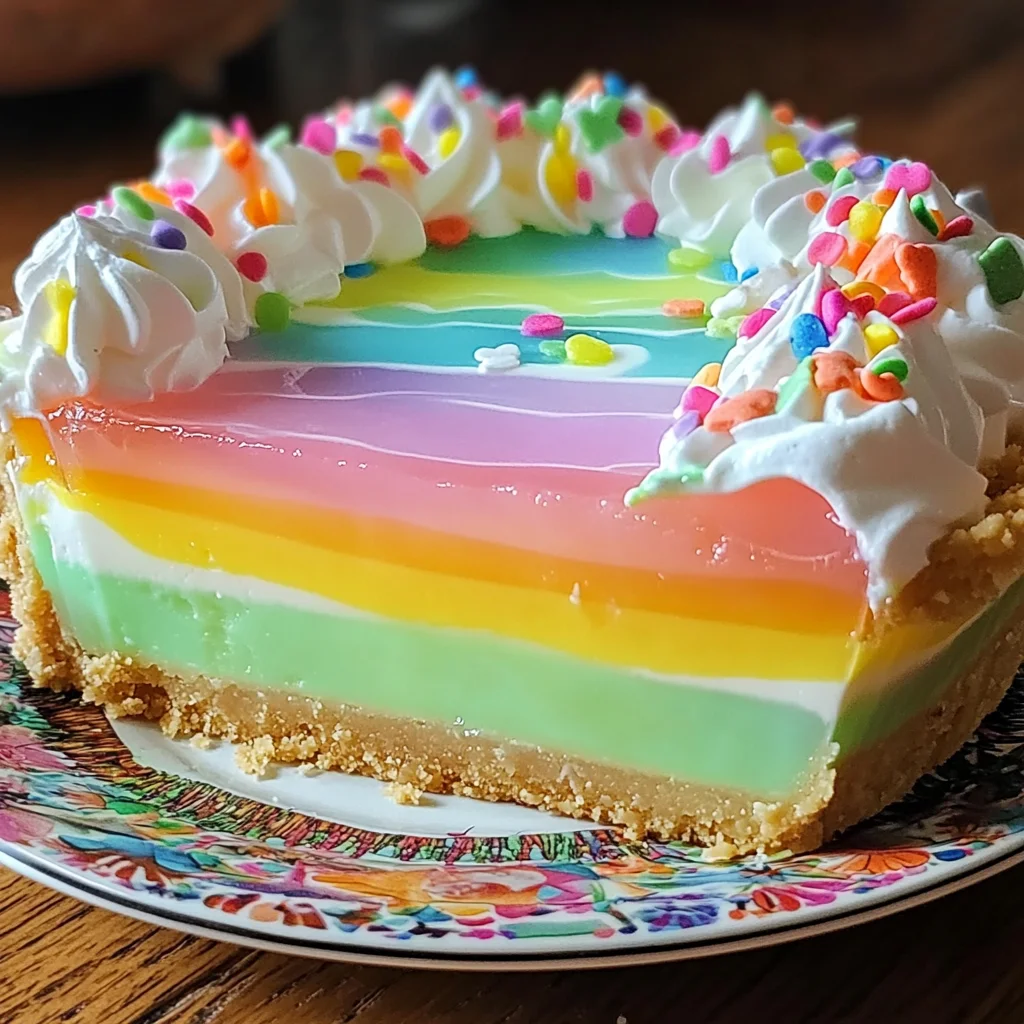
The Easter No Bake Jello Pie is a festive and delightful dessert that’s perfect for any gathering. Its layers of creamy filling and fruity jiggly texture make it visually appealing and refreshing. Feel free to customize with your favorite flavors or toppings! Try this recipe today and impress your family and friends with this fun dessert!
Easter No Bake Jello Pie
Elevate your holiday celebrations with this vibrant Easter No Bake Jello Pie. This delightful dessert features luscious layers of creamy goodness and fruity jello, making it the perfect sweet treat for any occasion. With its colorful presentation, this no-bake pie is not only easy to prepare but also a fun activity for kids to join in on. Customize the flavors to match your festive theme or personal preferences, and watch as it becomes the star of your dessert table. Enjoy a refreshing slice that combines creamy textures with fruity bursts, ensuring smiles all around!
- Total Time: 0 hours
- Yield: Approximately 8 servings 1x
Ingredients
- 1 pre-made 9-inch graham cracker crust
- 8 ounces cream cheese, softened
- 1/2 cup granulated sugar
- 1 teaspoon vanilla extract
- 2 small boxes (3 ounces each) assorted Jello flavors
- 2 cups boiling water (1 cup for each Jello layer)
- 2 cups cold water (1 cup for each Jello layer)
- 8 ounces whipped topping, thawed
Instructions
- In a mixing bowl, beat softened cream cheese until smooth. Gradually add sugar and vanilla extract until fluffy.
- Prepare the first Jello layer by dissolving one box of Jello powder in 1 cup boiling water. Stir in 1 cup cold water and set aside.
- Pour half of the prepared Jello mixture into the graham cracker crust; refrigerate until partially set (30-45 minutes).
- Spread the cream cheese layer over the first Jello layer once firm.
- Repeat steps for the second Jello layer using the remaining box of Jello powder.
- Once cream cheese layer is firm, pour remaining Jello mixture on top and chill completely (4-6 hours or overnight).
- Before serving, top with whipped topping and optional decorations.
- Prep Time: 30 minutes
- Cook Time: N/A
- Category: Dessert
- Method: No Bake
- Cuisine: American
Nutrition
- Serving Size: 1 serving
- Calories: 240
- Sugar: 28g
- Sodium: 200mg
- Fat: 10g
- Saturated Fat: 6g
- Unsaturated Fat: 3g
- Trans Fat: 0g
- Carbohydrates: 36g
- Fiber: 0g
- Protein: 2g
- Cholesterol: 30mg